
If you’re new to hunting, wildlife tracking, or just enjoy observing the natural world, a trail camera can be useful to own. Designed to capture photos or video when triggered by motion, trail cameras allow you to monitor animal activity in a specific area without needing to be there in person.
Whether you’re scouting deer, tracking pests, or simply curious about what moves through your property overnight, setting up a trail camera built for local conditions can give you a clearer picture of what’s happening when you’re not around.
Choose the Right Location
The success of your trail camera setup depends heavily on where you place it. Look for high-traffic areas where animals are likely to move.
In New Zealand, this could be along a game trail, at the edge of a paddock, near a water source, or close to a bait or feed site if local laws permit. You’ll want to position the camera where you have a clear line of sight but also where it’s unlikely to be disturbed by livestock, curious humans, or shifting branches that could trigger false captures.
Before installing your camera, scan the area with a pair of binoculars. Walking directly through it helps you identify animal tracks, droppings, or paths without disturbing the site. Good glassing from a distance allows you to select strategic points and adjust based on natural movement patterns.
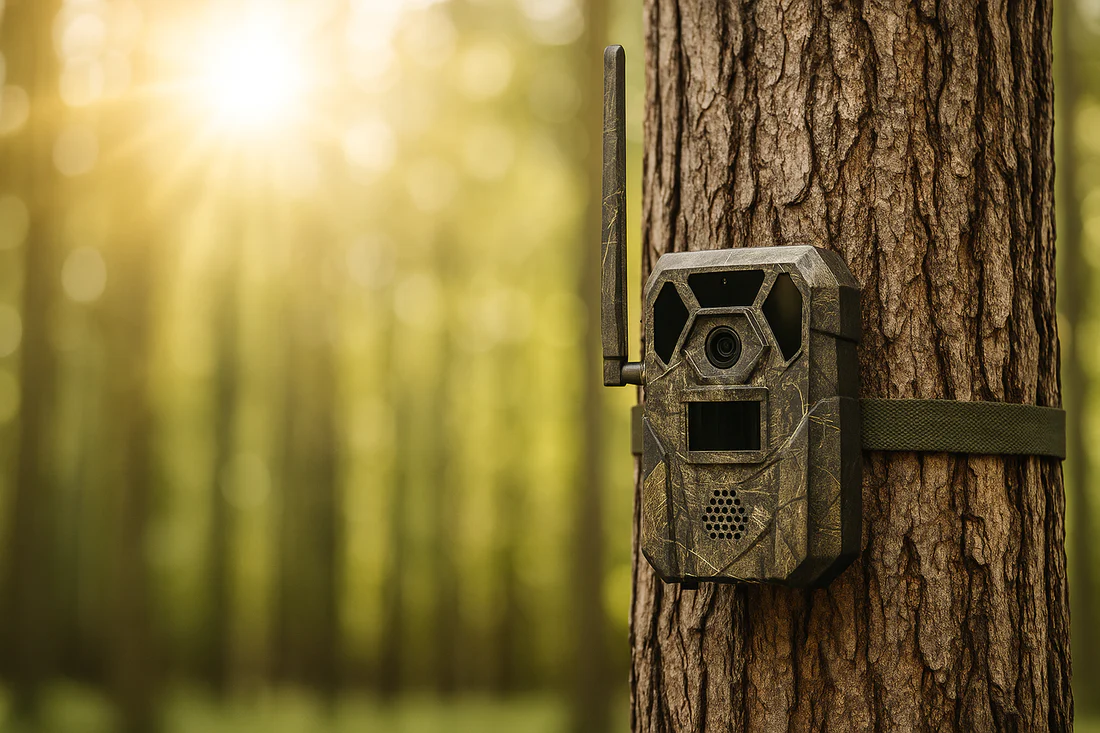
Mount It at the Right Height and Angle
One of the most common mistakes beginners make is mounting the camera too high or too low. For general wildlife monitoring or deer tracking, around waist-height (roughly 90–120cm off the ground) is a good rule of thumb. You’ll also want the lens angled slightly downward to capture a wider view and avoid sky glare, especially in open areas.
In wetter regions of New Zealand or areas with dense bush, your trail camera should be protected from rain, moisture, and excessive foliage.
Use the Right Settings for the Environment
Modern trail cameras come with various settings: photo or video mode, burst shots, motion sensitivity, and night vision capabilities. Night mode is essential for bush-covered or shaded areas. Set the sensitivity high enough to catch smaller animals but not so high that leaves or insects trigger dozens of empty frames.
It may take a few tries to fine-tune the settings. Once your trail camera is in place, use binoculars from a distance to observe whether it’s positioned correctly. If you notice animals avoiding the area or the camera blinking unnecessarily, it may need repositioning.
Check Regularly but Avoid Disturbing the Area
One of the benefits of a trail camera is that it works around the clock without needing constant monitoring. However, you’ll still need to check it now and then to replace batteries, change memory cards, or review footage. Try to minimise disturbance by visiting during midday when animal activity is lower, and wearing scent-reducing clothing if you’re in a sensitive hunting zone.
You can check footage remotely if your trail camera NZ model supports wireless transmission.
Review, Learn, and Adjust
Trail cameras are more than just motion-triggered gadgets; they’re tools for learning. By reviewing footage over time, you’ll begin to recognise movement patterns, feeding schedules, and even individual animals. That information becomes invaluable for hunters preparing for the season or landowners managing game or pests.
Ready to Start Tracking?
If you’re keen to start monitoring wildlife on your land or level up your scouting strategy, invest in a trail camera that Kiwi hunters and outdoor enthusiasts rely on.
Visit Ridgeline Clothing to explore field-tested outdoor gear, including accessories that pair perfectly with your trail camera setup. Whether you’re watching for deer or simply curious about what passes through the bush at night, the right gear helps you stay one step ahead.


